1. The Genetics of Why Poodle Mixes Mat So Rapidly
Breeders often describe Goldendoodles, Labradoodles, Aussiedoodles, and Cavapoos as "hypoallergenic, non-shedding coats." What actually happens genetically when you cross a double-coated shedding retriever or herding dog with a single-coated curly Poodle is a combination coat:
- The retriever/spaniel parent contributes dense telogen-shedding undercoat fibers that detach inside the follicle every few weeks.
- The Poodle parent contributes spiraled, wool/fleece outer curls that refuse to let detached hairs fall onto your living room rug!
Instead of shedding onto your floor, every single dead hair stays trapped inside the neighboring spiral curls. Add friction (harness straps, behind the ears, inner thighs), static electricity, or moisture (rain, swimming, licking paws), and those trapped hairs felt together identically to sheep's wool turning into boiled felt.
Soft puppy fluff almost never mats for the first 7 months—lulling owners into thinking a quick 2-minute brush once a week works fine. Around 8 to 13 months of age, the entire puppy coat sheds out simultaneously just as coarse adult curls push up through it. During those 16 weeks, a Doodle with a 1-inch coat can go from tangle-free to completely pelted in 7 days unless line-brushed 4–5 times weekly or trimmed down to an easy 3/8" (#4F) transitional length.
2. Why "Top-Brushing" Deceives Well-Meaning Owners
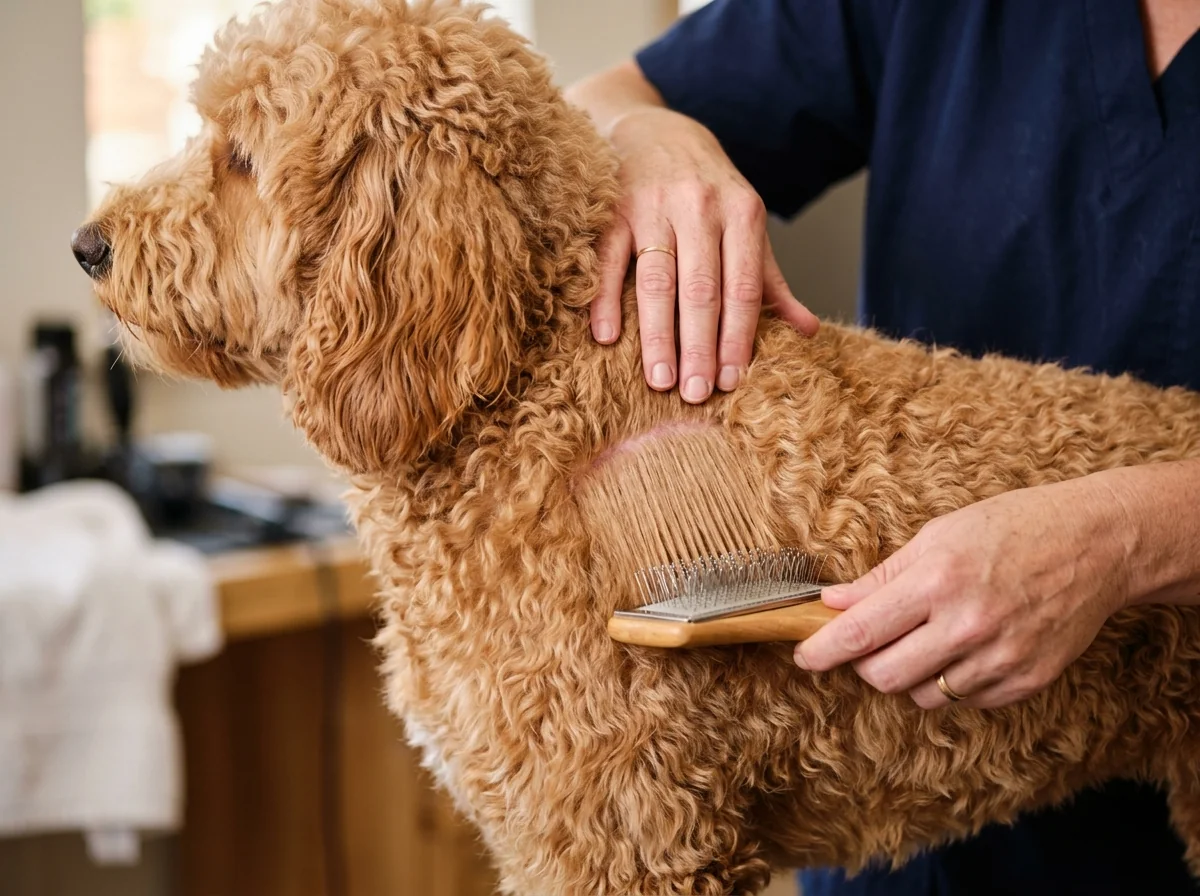
When you place a brush flat on top of a 1.5-inch curly coat and stroke from neck to tail, angled wire pins compress the spongy curls downward. The pins clean the outer 4mm canopy—making your dog look freshly fluffed—while sliding right over the dense 6mm mat layer forming next to the skin!
If you never see a pale line of skin while brushing a Doodle or Poodle, the brush pins are not reaching the root zone where mats form.
3. The Only 3 Tools You Actually Need (Ditch Ball-Tip Pin Brushes!)
- Long-Pin Curved Slicker Brush (
20–25mmflexible stainless pins, NO plastic balls on the tips): Epoxy balls on brush pins snag curly fleece and prevent penetration to the base. Choose a curved slicker pad with cushioned air-flex backing (Chris Christensen Coral / Tuff / comparable long-pin professional slickers). - Stainless Steel Greyhound Comb (
7.5"to10"length with half coarse, half medium-fine rounded teeth): Your mandatory quality-control gauge. - Silicone-Free Conditioning Mist Spray: Lightly dampens dry static before brushing so hairs slide past one another without snapping.
4. Step-by-Step Line-Brushing Mechanics (Bottom-Up Method)
- Start at a Back Paw, Working Upward: Have your dog lie comfortably on their side on a yoga mat (easier on both your wrists and their joints!). Hold all hair above the ankle hock upward against the leg with your non-dominant palm so you see bare skin at the horizontal part line.
- Pat-and-Pull Wrist Roll (Zero Scraping!): Place the slicker pins parallel just below your part line—so the flat sides of the bent pins touch hair, never stabbing sharp tips perpendicular into skin. Pull downward with a gentle wrist roll away from the skin. Test that exact angle on your own bare forearm first: if it leaves red scratch lines on your arm, lighten your pressure!
- Drop Down 1/2 Inch & Repeat: Release a thin curtain of hair from under your upper hand to form a new horizontal part line 1/2 inch higher up the leg. Brush down until clear.
- Verify Every Zone Immediately with the Metal Comb: Before moving from the hind leg to the hip, slide the coarse side of your stainless Greyhound comb from the skin outward. If it snags on a tiny knot, pinch the base of that hair lock between thumb and index finger so skin isn't tugged, mist once, and tap-brush from the outer tip of the knot inward until the comb glides freely.
5. The 7 High-Risk Friction Zones (2-Minute Daily Check)
Short on time on a Tuesday night? Even if you only do a full body line-brush twice a week, spend 120 seconds running your metal comb through these seven hotspots where 85% of Doodle mats start:
- 1. Behind & Beneath Ear Leathers (where head-shaking rubs damp ear hair against neck curls)
- 2. Collar & Harness Strap Tracks (remove collars and nylon harnesses indoors! Rolled leather collars mat 70% less than flat nylon webbing)
- 3. Axillary Armpits
- 4. Front Elbows & Pasterns (where dogs lick paws)
- 5. Groin & Inner Thighs
- 6. Base of the Tail & Sit-Bones
- 7. Muzzle Beard Corners

Written by Sarah Jenkins
Sarah has coached hundreds of Goldendoodle, Bernedoodle, and Poodle families out of repeat shave-downs using cooperative line-brushing routines. Read Case Study #1 →